Showing posts with label metamorphosis monday. Show all posts

Sunday, February 26, 2012

Ocean-inspired DIY art

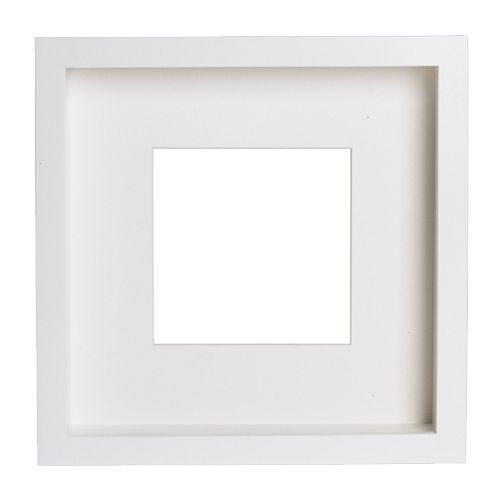
I’ve got a little DIY art project to share with you today. Whenever we go to the ocean, I always pick up shells and stones that catch my eye. Then they come home with me and sit in a bag in my closet. I needed to do something with the shells so I could actually see & enjoy them. So I came up with this little project using sand dollars and an oyster shell that I found, and a small starfish that I bought last year in Maine. All it took was some paint samples from Sherwin Williams, Ribba shadow box frames from Ikea, and 3D foam adhesive squares.

imageRIBBA Frame   Shadow box frame.  The image can sit against glass or be recessed. The mat enhances the picture and makes framing easy.

I cut the paint chip samples slightly bigger than the openings in the mats and taped them to the backs of the mats. Then I attached the sand dollars and starfish to the paint chips with the 3D foam adhesive squares (the oyster shell is heavier and required hot glue to make it stick).

project 3  project 4project 1  project 2

And the final product.

project 7 pn   project 8 pn

After these frames were done, I picked up a mirrored frame at HomeSense. It was on sale for $7.00 because it was missing the back piece. Easy to fix – I just cut a piece of cardboard to size. Then I put a paint chip sample into the frame and attached the sand dollar to the front of the glass with the scrapbooking 3D foam adhesive squares.

DSC_0051

And voila, easy & inexpensive DIY art that reminds me of my trips to the ocean. You could do the same thing with any small mementoes or keepsakes – keys, brooches, coins, concert tickets… get creative and have some fun :-)

Linking up to Metamorphosis Monday at Between Naps on the Porch and Fabulous Feature Friday Free For All at Five Days… 5 Ways. And thank you to The Arts and Crafts Today for including my project as one of their top stories for today :-)

sig turquoise

Monday, February 20, 2012

A bubblelicious DIY project

I love, love, love Bocci light fixtures:

bocci

So cool, but so expensive and so not happening in my house. Till I found this awesome bubble “light fixture” project by Jenna at Homeslice:

jenna 1

How awesome is that?! Jenna and her husband created their own version of a bubble light fixture (minus the light) using glass bubble balls from CB2, ornament caps from D. Blumchen & Company, and some ingenuity.

cb2     

There was no question that I was going to make one of these babies, I just didn’t know where I would put it. And then I had an ah-ha moment – it would be the perfect piece to hang above the fireplace in the family room. So I bought the supplies and hubby and I used the tutorial by Jenna as a guide for putting it all together. We made some modifications based on the number of glass balls we used (Jenna used 15, we used 25). Here’s a quick rundown of what we did.

How we did it

Hubby built the board that the bubbles hang from and I painted it the same colour as the fireplace mantel, Benjamin Moore Cloud White. It’s the same length and width as the mantel – about 66” x 17”

board steps

This is where hubby turned it into a total mathie project. There are two sizes of balls, 4” and 6”. The size of the space above the fireplace where the glass balls hang is 45L” x 30H” x 13D”. Hubby generated a list of random numbers from a website like this one, and used the numbers to position each ball within the space. If a number caused an interference with an already set glass ball, he moved to the next number. Sorry if that makes no sense to you – it doesn’t make sense to me either! At any rate, here’s the AutoCAD version of the final glass ball layout:

CAD

Now on to the actual construction. Hubby drilled small holes in all the appropriate places on the board. Then we cut pieces of invisible thread to the required lengths and attached one end of each piece of thread to a metal ornament cap and tied a loop in the other end. The looped end went through the hole in the board (from painted side to unpainted side) and around a toothpick – very high-tech! The toothpicks hold each thread in place when the thread is taut, but I added a piece of tape to each toothpick to be extra-sure the threads stay in place. To prevent the threads from getting tangled (been there, done that, not fun!), I taped each thread to the front of the board until the board was installed.

steps 1a

Then it was time to attach the board to the ceiling above the fireplace. Hubby screwed three pieces of wood to the ceiling, and then screwed the board to the pieces of wood.

hanging board

As you can see, there are two pot lights right in front of the board. So even though this isn’t going to be an actual functioning bubble light fixture, it sort of acts like one with the pot lights right there.

Then it was finally time for the fun part! Hubby removed the pieces of tape and let the lengths of thread fall loose…

strings

…and I left it up to hubby to attach the glass balls to the ornament caps, because I knew if I did it, there would be some glass ball casualties. My job was unpacking the balls and removing the stupid stickers. And this is how it turned out (I’m still debating how to accessorize the top of the mantel):

final 1

final 2

close-up

Trying out some other accessories…. I’m kinda stumped. Maybe it doesn’t need any accessories at all? I can’t show you too much of the fireplace because that’s a makeover for another day :-)

final 5

mantel with floats RS

final 7

final from below

final from side

I just love my bubble light fixture – except for the fact that I can’t get the song ♫ Tiny Bubbles ♫ out of my head. Is it in yours now too? ;-) I have to send another big thank you to Jenna at Homeslice for inspiring this project. If you want to make your own bubble light fixture, definitely check out her tutorial.

And while we’re on the topic of bubbles, today I’m guest posting over at Lisa Goulet Design, and it’s all about George Nelson Bubble Lamps. I’m also linking up to a few blog parties – Metamorphosis Monday at Between Naps on the Porch, Feature Friday Free-For-All at Five Days… 5 Ways, and Sass’s Sunday Salvation Show #12 at Sassafrass Salvation.

Come on, admit it, you’ve got the song stuck in your head now too, don’t ya?!

sig turquoise

Sunday, January 15, 2012

The OMFG Painting

imageLast year, one of the things on my to-do list for 2011 was to create a painting. It ended up being the only thing I didn’t get done – I think I was just too intimidated by the thought of putting paint to canvas. But I wasn’t intimidated by building a railing from scratch – go figure ;-) I’ve never taken art lessons, and although I’m pretty creative, I’m far from being an artist. I can’t even draw stick people properly.

Anyway, a couple of days ago, I decided that I was going to just do it. If it came out crappy, no big deal, I’d just paint over it and start again. I had an image in my mind of how I wanted the painting to turn out and an inspiration picture that I was going to use to get me started.

The first step was spray painting the canvas gold & silver.

Gold and silver canvas

I let it dry overnight, and then I set myself up on the kitchen counter with my canvas, my paint, by brushes, a container of water, and the laptop so I could look at the inspiration painting {I REALLY need a proper craft room}.

I squirted some purple paint onto the canvas and spread it around. Then I tried to squirt some white paint onto the canvas, but the paint just came out in little drops. So I squeezed the bottle harder, and PPPPHHHHTTTTT – white paint squirted onto the canvas. And the kitchen floor, the kitchen walls, the kitchen cupboards, the kitchen countertop, the fridge, the stove, the family room floor, and the laptop. OMFG

splatter 1

I got a couple of splatters on my camera bag, but managed to somehow miss the dog food bowl.

splatter 2

See how far away the fridge is? How the heck did the paint squirt that far?!

splatter 3

And to top it all off – after 1-1/2 hours of cleaning up the mess, I gave the laptop one last suck with the vacuum to get off the last bits of dried up paint. And schloop, there went the period key.

Bye-bye period key, hello run-on sentences

So a few hours and many bad words after starting, the painting came out nothing at like I had envisioned or like the inspiration painting. But I like it anyway :-) I think I’m going to call it OMFG ;-)

Painting

Actually, I shouldn’t be surprised by the paint explosion. You may remember the catastrophe I had when I painted the family room last spring that resulted in this:

shoes

Anyway, because I’m a glutton for punishment – I mean, because painting #1 was so much fun – I decided to make another painting today. No story to go with this one, though! I started with a gold canvas {ignore the broccoli and bag of flour and cans on pineapple}.

blue before

It was supposed to be a beach with crashing waves, but that plan got changed somewhere along the way {like, 5 seconds into it}.

blue 2

A couple of close-ups.

blue close 2blue closeYep, those are globs of paint on the countertop!

See the speckles in the corner? I sprinkled glitter all over the painting while it was still wet. It doesn’t show up very well in the picture, but it’s pretty cool in real life.

glitter

Oh, and hubby found the period key in the vacuum canister. So all is right with the world again :-)

I’m linking up my canvas makeovers to Metamorphosis Monday over at Between Naps on the Porch. Hopefully nobody else had a massive paint catastrophe this week!

sig turquoise

Sunday, December 4, 2011

The Big Bang Theory chandelier

It’s taken ten years, but FINALLY we’ve replaced all the ugly light fixtures in our house – YAY! The Hollywood lights in the bathrooms were some of the first ones to go. Easy enough, they’re not too high up on the wall, just a step or two up a ladder to reach them. Unlike the chandelier in the entry, which has a vaulted ceiling about 14 feet high.

old chandy 2

I’ve been wanting to replace this chandelier pretty much since we moved into our house 10 years ago, but convincing hubby to take it down wasn’t the easiest thing to do.

old chandy 1

A couple of weeks ago, Bellacor had a sale and the chandelier that I really wanted was too good a deal to pass up, so I bought it :-) Seeing as the huge box it came in took up half the entry, he had no choice about hanging it ASAP ;-)

box

Hubby came up with a creative buy scary way to reach the ceiling… Eeek! My poor dining table!

dr table 2   dr table 3dr table 4   dr table 5ladders

So onto the dining table and up the ladder hubby went…

up ladder

And down came the brass & plastic-trying-to-be-crystal chandelier. YAY!

old gone 2

The canopy that came with the new chandelier was too big to fit on that little build-out on the ceiling where the chandelier hangs from. So, I took the old brass canopy, sanded it, and sprayed it with a combination of silver & cold paint that I already had.

brass cap

brass cap scuffed

spray paint

brass cap painted

Half an hour later, the canopy was dry and it was time to hang the new chandelier… it’s the Solaris in Olde Silver, and I love it!

chandy close 1

daylight off

daylight off 4

daylight off 3

daylight off 5

Ahhhh, soooooooooooo much better than the old chandelier! Hubby says he doesn’t like it, so I’m trying to convince him that it looks like a Big Bang Theory atom. Kinda, sorta, yes?

chandy night 1

So that’s the latest makeover in our house. I’m linking up to Metamorphosis Monday at Between Naps on the Porch – head on over to check out this week’s other makeovers.

Don’t miss out on Bake-N-Blog Holiday Edition, Part 2 happening on Wednesday, December 14th!

Click here for all the details.

BB button 3a

sig turquoise